FACTON EPC 12.0 SC
The version FACTON EPC 12.0 SC is a major release.
Read the Release Notes as PDF:

System Requirements
Installation and Compatibility
FACTON EPC 12.0 SC requires the EPC Platform version 12.0.2 and EPC SC 11.0 as basis for existing customers.
Update Requirements
| No relevant adjustments required | |
| X | Migration steps required, see Migration from version 11.0 to 12.0 |
Release - Summary
FACTON EPC 12.0 SC contains the following enhancements:
- Calculation
- Cost models
- Usability
Functional Enhancements
Calculation
Cost elements for tools and fixtures
As of version 12 it is possible to determine the acquisition costs for tools and fixtures by using further cost elements. Thus, you can consider the costs of tools and fixtures within a calculation in a more detailed way.
Material quantity calculation
The material quantity calculation for the geometric form types Coil and Sheet was simplified. For the quantity calculation of coils and sheets it is now possible to have the output quantity determined. Further, both form types support the use of a material utilization degree.
When calculating casted materials, you can now consider loss due to cleaning procedures.
Manufacturing overhead costs
You can now choose the base for calculating manufacturing overhead costs (either labor cost or direct manufacturing cost), provided that you are working with company-own data (as Data Origin) in your calculation.
If you are working with Benchmark data, this selection is not available.
Work Steps
The work steps now support the display of parallel and sequential work step procedures in the calculation.
Cost Models
Connectivity of Cost Model Designer and Should Costing Solution
You can define cost models in the FACTON Cost Model Designer and then integrate these models in the Should Costing Solution where users can work with them.
Despite assemblies and manufacturing processes, version 12 also supports parts and work steps as active calculation elements. Furthermore, all calculation elements (except Grouping) can be selected as passive elements of a calculation.
2-Component Injection Molding cost model
The 2-component injection molding cost model can be used at processes. This cost model was created with the Cost Model Designer version 12 and represents the many options you have with the CMD. Customers who already own a Cost Model Designer license can adjust this cost model to their specific needs.
Usability
Improved clarity for view schemes
You can now use icons to switch between view schemes. The user can toggle a certain view schema by clicking on comboboxes or icons.
Quick estimation
When quickly estimating, each calculation element can be estimated by using two values. A detailed cost estimation is still available for every element, if required.
Improved clarity for machine rate calculation
For the machine rate calculation, only those fields are displayed that are relevant to the allocation method. This way, all unnecessary properties are not visible anymore.
Calculation queries
When searching for calculations, you can now choose between two predefined queries whose results are ordered by label or modification date of the calculations.
Reports
The Bill of Material Report now shows all data relevant for the selected calculation element and its sub-elements. Thus, it is possible to create BoM Reports for individual elements of a calculation.
Edit Benchmark machines
The machine properties of Benchmark data machines can now be overridden to support a quick adjustment of comparison data in the calculation.
Migration steps from version 11.0 to 12.0
- A backup of your database should be created.
- The configuration has been updated from version 11.0 to version 12.0.
- The global properties have been synchronized according to the configuration update to version 12.0 (details on updating master data can be found in our Online Help)
Before proceeding with the migration, please review all steps in advance, as some properties may need to be saved or noted.
Migration of work steps (master data)
In order to achieve compatibility of the SC with the CMD (Cost Model Designer), the signature of work steps had to be replaced. The old work step resources must therefore be exchanged by new so-called "weak" resources:
You need to have the role "SC Master Data Administrator" or "SC System Administrator".
-
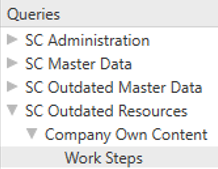
In the "Master Data" workspace, execute the Explorer query "SC Outdated Resources | Company Own Content | Work Steps":
-
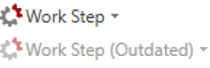
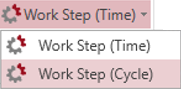
For each outdated work step listed in the result, create a new resource of type "Work Step (Cycle)".
-
Transfer (copy) all property values from the outdated work step resource to its new resource.
-
Save and publish your changes.
Migration of local resources (calculations)
In order to make the SC compatible with the CMD, various resources had to be restructured. Please follow the instructions to transfer your outdated calculations to current calculations:
-
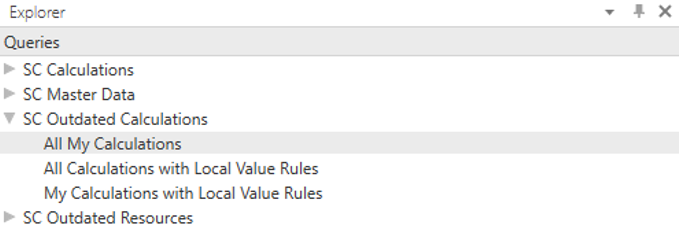
In the "Calculations" workspace, execute the Explorer query "SC Outdated Calculations | All My Calculations":
-
Open each outdated calculation in the result list via the context menu (right-click) "Open in New Tab".

-
Create a version of each outdated calculation.

-
Save and publish your changes.
-
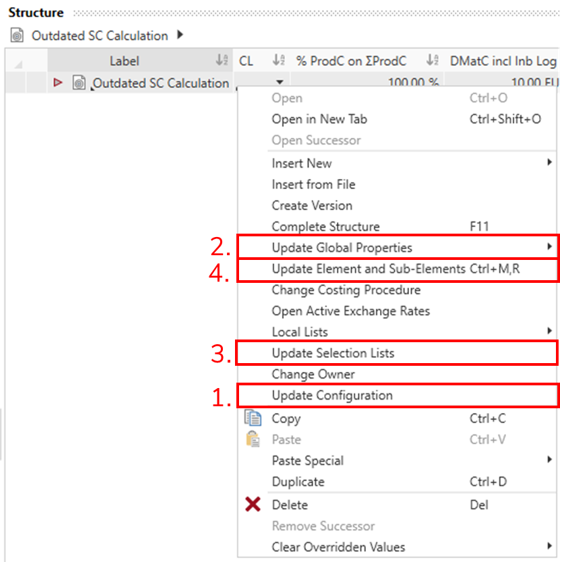
Update each outdated calculation via the context menu (right-click) in the following order:
1) Configuration, 2) Global Properties (all), 3) Selection Lists, and 4) Elements and Sub-Elements
-
Open the previously created version (calculation with version no.) in the "Work History" view (via "View" ribbon or CTRL + 6).
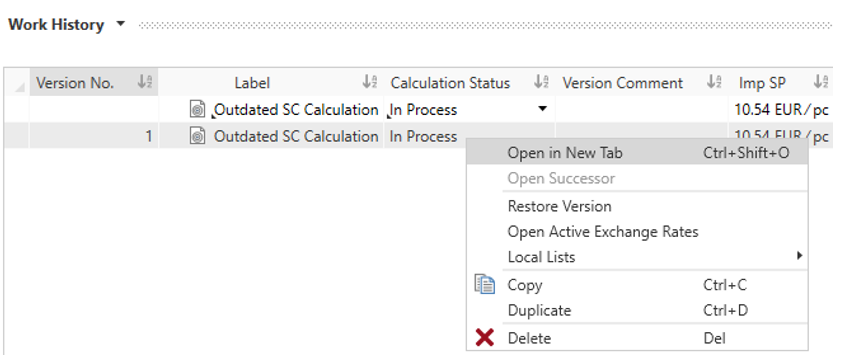
-
Only show the "Details" and "Structure" views via the "View" ribbon (other views are irrelevant for the following steps).
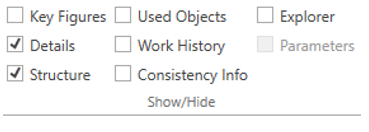
-
Drag and drop the tab of the version next to the tab of the new calculation to compare both calculations directly:

-
Go through each resource in the calculation structure and compare the individual values of the properties. To transfer the values from the version to the new calculation, follow the migration steps depending on the resources/cost models listed in the following sub-chapters:
- Migration of workers and setup operators
- Migration of tools and fixtures
- Migration of special direct costs
- Migration of machines
- Migration of materials
- Migration of cost model "Sawing" (assembly)
- Migration of cost model "Injection Molding" (process)
- Migration of cost model "Work Step Calculator" (process)
- Migration of cost model "Annealing" (process)
- Migration of cost model "Chipping" (process)
- Migration of cost model "Tempering" (process)
WARNINGOnly carry out the steps if the condition listed in the following tables applies to your use case.
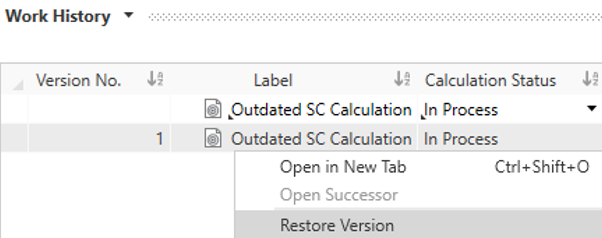
If you want to restore your calculation for any reason, you can do so in the "Work History" view by right-clicking on the version and selecting "Restore Version".
Migration of workers and setup operators
For workers and setup operators, the following property values of the "Details" view must be manually transferred from the version to the new calculation:
| Condition | Property in version | Property in new calculation (after updating) |
|---|---|---|
| - | Calculation > Labor Group | = same as in version |
| - | Calculation > Number of Workers | = same as in version |
| - | Calculation > Number of Parallel Operated Work Stations | = same as in version |
| - | Calculation > Tie Up Rate at Process | = same as in version |
Migration of tools and fixtures
For tools and fixtures, the following properties of the "Details" view must be transferred from the version:
| Condition | Property in version | Property in new calculation (after updating) |
|---|---|---|
| The tool or fixture is a local resource (not a master data resource) and has the valuation "*Calculate Allocation". | Calculation > Investment > Purchase Value | = same as in version |
Migration of special direct costs
For special direct costs, the following properties of the "Details" view must be transferred from the version:
| Condition | Property in version | Property in new calculation (after updating) |
|---|---|---|
| The special direct costs are local resources (not master data resources). | Calculation > Special Direct Cost Category Calculation > Cost per Unit |
= same as in version |
| The special direct costs have the valuation "*Calculate Allocation". | Calculation > Number of Units | = same as in version |
Migration of machines
The following property values for machines must be transferred from the version to other properties of the new calculation in the "Details" view:
| Condition | Property in version | Property in new calculation (after updating) |
|---|---|---|
| At the machine, the property "Calculation > Fixed Machine Cost > Relevant Imputed Depreciation Period" is set to "Imputed Depreciation Period corresponds to the depreciation period specified manually". | Calculation > Fixed Machine Cost > Specified Imputed Depreciation Period | Calculation > Fixed Machine Cost > Depreciation Period |
| - | Calculation > Capacity, Utilization & Allocation Method > Machine Rate Base | = same as in version |
Migration of materials
Please follow the steps below if you have set the listed quantity valuations at your material:
Migration of materials with quantity valuation "Calculate Casted Material":
| Condition | Required adjustment in new calculation (after updating) |
|---|---|
| - | Activate the checkbox "Calculation > Consider Volume" |
| - | Activate the checkbox "Calculation > Machined Parts" |
Migration of materials with quantity valuation "Calculate Sheet":
| Condition | Required adjustment in new calculation (after updating) |
|---|---|
| - | Set property "Calculation > Calculation Method" to "Feeds" |
Migration of cost model "Sawing" (assembly)
For technical reasons, it was decided for SC 12.0 to provide the "Sawing" cost model for the "Part" resource instead of the "Assembly" resource. The cost model is no longer supported for the assembly. To transfer the cost model, please proceed as follows:
-
In your cost model calculation for "Sawing", add a new part on the same level and with the same quantity type as the assembly (e.g. "piece").

-
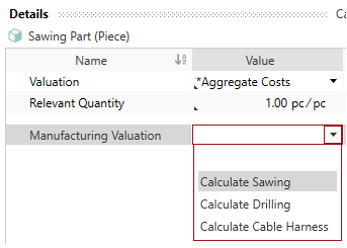
At the part, set the "Manufacturing Valuation" to "Calculate Sawing" in the "Details | Calculation".
-
Transfer the value for "General Properties | Material Classification" from the assembly to the part.
-
Transfer (copy) all other values under the group "Manufacturing Valuation" from the assembly to the part.
-
Select the part in the structure and select "Complete Structure" in the context menu (right-click).
If several resources are found, select the correct machine or material in the selection dialog.
-
Delete the assembly after transferring all values to the part.
-
Save and publish your changes.
Further Information on the cost model can be found in our Online Help.
Migration of cost model "Injection Molding" (process)
The "Injection Molding" cost model was newly developed with the CMD. The old cost model is no longer supported. If you want to keep using the old cost model, you should not update the process (in this case, the migration steps are irrelevant for you).
If you do wish to use the new cost model, please carry out the following migration steps:
-
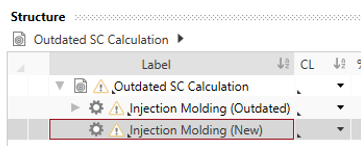
In your cost model calculation for "Injection Molding", add a new process on the same level as the previous process.
-
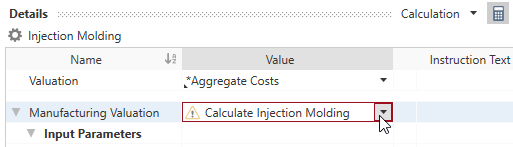
At the new process, set the "Manufacturing Valuation" to "Calculate Injection Molding" in the "Details | Calculation".
-
Transfer (copy) all property values from the old process to the new process.
-
Select the process in the structure and select "Complete Structure" in the context menu (right-click).
-
Delete the old process after transferring all values to the new process.
-
Save and publish your changes.
Further Information on the cost model you can find in our Online Help.
Migration of cost model "Work Step Calculator" (process)
This is how you ensure that all work step resources are migrated:
-
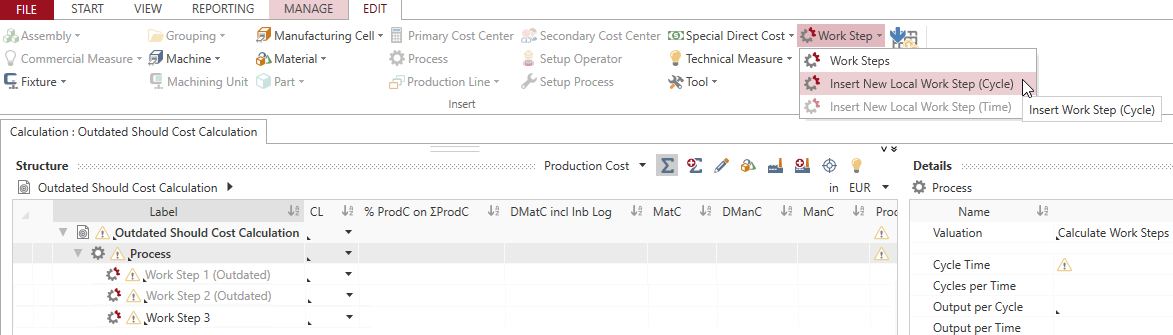
In your cost model calculation for "Work Step Calculator", create a new resource "Work Step (Cycle)" for each outdated (grayed out) work step under the process - either locally or in the master data, depending on the original work step.
-
Transfer (copy) all property values from each old work step to its new work step.
-
Delete the old work steps after transferring all values to the new work steps.
-
Save and publish your changes.
Further Information on the cost model you can find in our Online Help.
Migration of cost model "Annealing" (process)
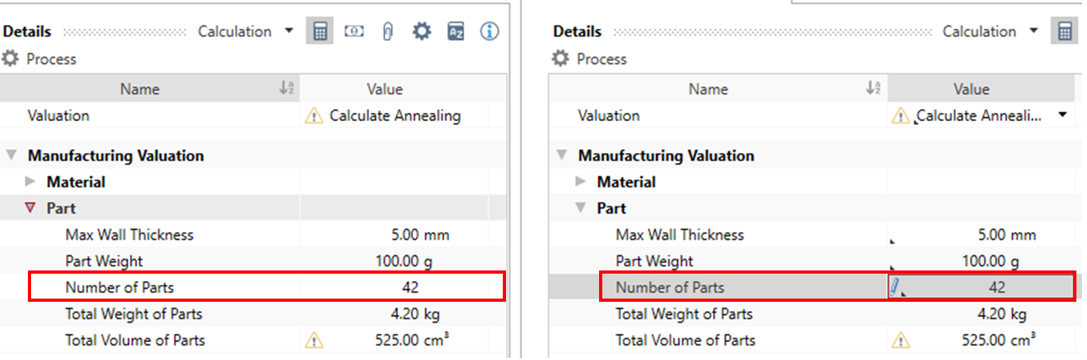
For the migration of the “Annealing” cost model, the values at the process for "Number of Parts" may have to be transferred manually. To do this, follow the migration steps:
-
Compare the version of your cost model calculation for "Annealing" with the corresponding new calculation.
-
Transfer the values for "Number of Parts" in the "Details | Calculation" at the process from the version to the new calculation, if the values do not match.
Please note that the new field is not a simple input field, but an overridable field (pen symbol) which is activated with F12.
- Save and publish your changes.
Further Information on the cost model you can find in our Online Help.
Migration of cost model "Chipping" (process)
For the migration of the "Chipping" cost model, the values for the "Positioning Count" at the work steps may have to be transferred manually. To do this, follow the migration steps:
-
Compare the version of your cost model calculation for "Chipping" with the corresponding new calculation.
-
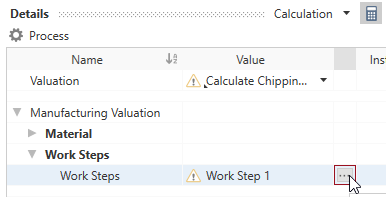
Open the local list for work steps for the old and the new process under "Details | Calculation | Work Steps" using the "[...]" button.
-
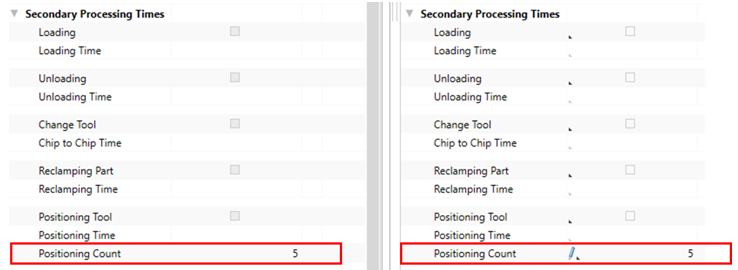
In the local list, select each work step and transfer the value for "Positioning Count" in the "Details | Secondary Processing Times" from the version to the new calculation, if the values do not match.
Please note that the new field is not a simple input field, but an overridable field (pen symbol) which is activated with F12.
- Save and publish your changes.
Further Information on the cost model you can find in our Online Help.
Migration of cost model "Tempering" (process)
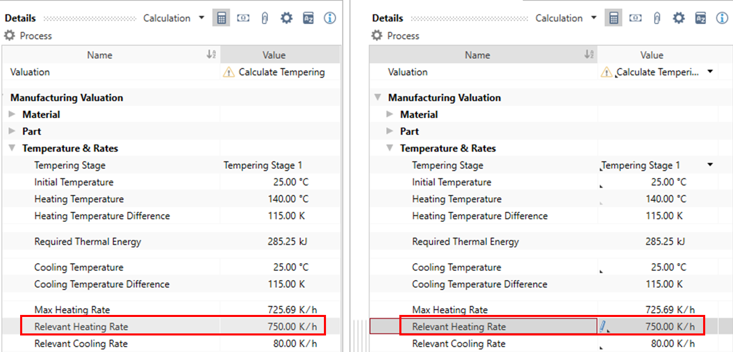
For the migration of the "Hardening & Tempering" cost model, the values for "Relevant Heating Rate" at the "Tempering" process may have to be transferred manually. To do this, follow the migration steps:
-
Compare the version of your cost model calculation for "Hardening & Tempering" with the corresponding new calculation.
-
Transfer the values for "Relevant Heating Rate" in the "Details | Calculation | Temperature & Rates" at the process from the version to the new calculation, if the values do not match.
Please note that the new field is not a simple input field, but an overridable field (pen symbol) which is activated with F12.
- Save and publish your changes.
Further Information on the cost model you can find in our Online Help.
Migration of Excel import templates
With regard to CMD compatibility, some new properties had to be introduced. These changes also affect some properties in existing Excel import templates. The column names of the tables must be updated in some combinations. Templates that import master data do not need to be adjusted.
If you want to use your existing Excel import templates, please change the templates for local calculation structures according to the scheme in the following sub-chapters:
- Adjust import templates for work steps
- Adjust import templates for workers and setup operators
- Adjust import templates for tools
- Adjust import templates for fixtures
- Adjust import templates for special direct costs
- Adjust import templates for machines
Adjust import templates for work steps
The following changes are required in the Excel templates for importing work steps:
-
Rename the "_Signature" for all work steps from "WorkStep" to "WorkStep2".
-
Change the "_QuantityType" to "Cycle^1" for all work steps.
Example:

Adjust import templates for workers and setup operators
The following properties must be renamed in the Excel templates for importing workers and setup operators:
| Old property | New property (after updating) |
|---|---|
| NumberOfWorkers | NumberOfWorkersAtPosition |
| WorkerNumberOfSimultaneouslyOperatedWorkstations | WorkerNumberOfSimultaneouslyOperatedWorkstationsAtPosition |
| WorkerTieUpRateAtProcess | WorkerTieUpRateAtProcessAtPosition |
| LaborGroup | LaborGroupAtPosition |
Example:

Adjust import templates for tools
The following property must be renamed in the Excel templates for importing tools, if it is a local resource, not a master data resource:
| Old property | New property (after updating) |
|---|---|
| ToolPurchaseValue | ToolPurchaseValueAtPosition |
Example:

Adjust import templates for fixtures
The following property must be renamed in the Excel templates for importing fixtures, if it is a local resource, not a master data resource:
| Old property | New property (after updating) |
|---|---|
| FixturePurchaseValue | FixturePurchaseValueAtPosition |
Example:

Adjust import templates for special direct costs
The following property must be renamed in the Excel templates for importing special direct costs:
| Old property | New property (after updating) |
|---|---|
| NumberOfUnits | NumberOfUnitsAtPosition |
The following properties must be renamed, if it is a local resource, not a master data resource:
| Old property | New property (after updating) |
|---|---|
| SpecialDirectCostPerUnit | SpecialDirectCostPerUnitAtPosition |
| SpecialDirectCostCategory | SpecialDirectCostCategoryAtPosition |
Example:

Adjust import templates for machines
The following property must be renamed, as well as defined as key field (".Key") with value "MACHINE" in the Excel templates for importing machines:
| Old property | New property (after updating) |
|---|---|
| ManuallySpecifiedImputedDepreciationPeriod | MachineDepreciationPeriod |
Example:
